IPad 2 VPN configuration is still a very easy step. By following these simple steps you can easily install and configure the from Apple.
Best iPad 2 VPN Tutorial/Setup Guide
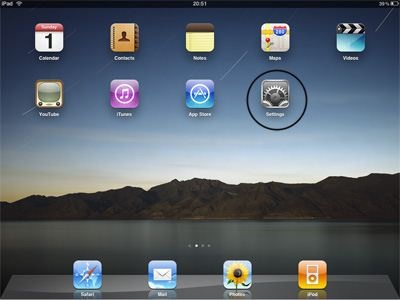
1. Go to the Settings application in your iPad.
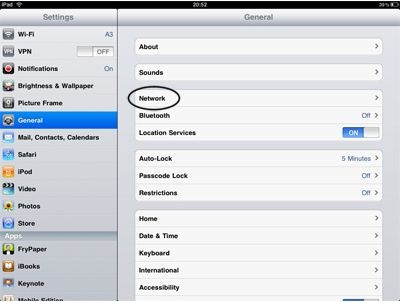
2. Select the Network option to open the network settings.
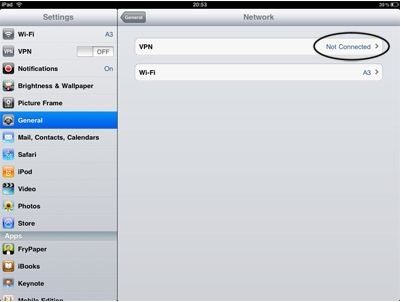
3. In Network settings page tap on VPN.
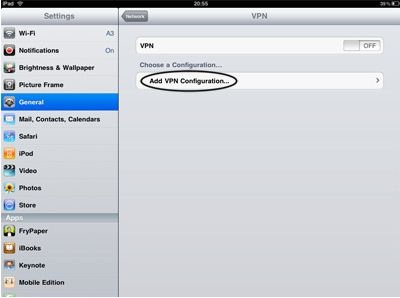
4. After that select Add VPN Configuration…
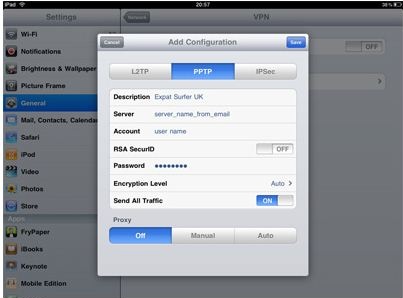
5. In the screen now open select PPTP.
Now fill in the fields as described below ![]()
-
Description: (in this field write the name of the group)
-
Server: (in this field fill in the Name or IP address of the server you want to connect)
-
Account: (the account ID provided to you)
-
RSA SecureID: (set it to OFF)
-
Password: (Password of the account ID)
-
Encryption Level: (Set it to Auto)
-
Send All Traffic: (set it to ON)
6. Now just tap Save on the top right corner of the window.
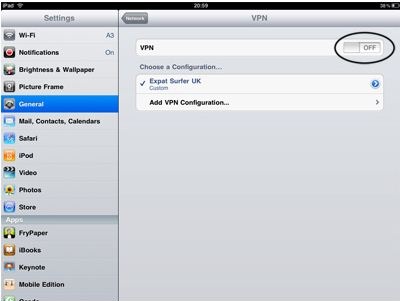
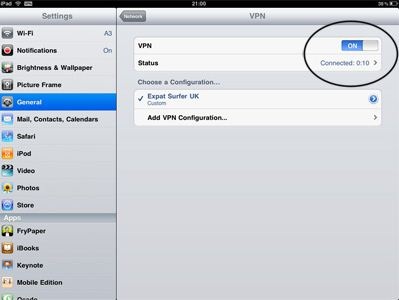
7. And there it is the VPN connection has been set up. To switch it on just swipe the VPN connection to ON.
8. Additionally you can see the VPN icon in the status bar.
Now after creating a VPN configuration you can also activate it and deactivate it. You will find an option of Turning Off and ON your VPN connection just beside where VPN is written in your Settings > Network area.
Visit for Details :



This was so helpful and easy! Do you have any atricles on rehab?
I was suggested this blog by my cousin. I’m no longer certain whether or not this submit is written by means of him as no one else know such specific approximately my problem. You’re amazing! Thank you!
Too many compliments too little space, thnkas!